| FAQ | Feed-back | Forum | Survey | Terms | Donate | About us |
| Home | Demo | Download | Register | Purchase | Documentation |
Chemovenetory v2.0
Part-II
Web based software - Installation Notes
Mysql Installation
Precompiled Mysql for many operating systems are available. You should download and install. http://dev.mysql.com/doc/mysql/en/Linux-RPM.html
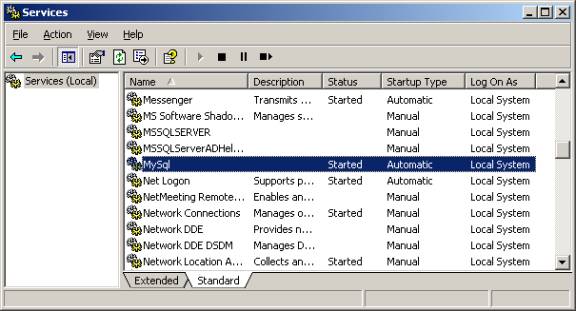
For windows, use mysql with installer. After installation start the mysql services.
Windows installation
To install MySQL
on Windows using a binary distribution, follow this procedure:
- If you are working on a Windows NT,
2000, or XP machine, make sure that you have logged in as a user with
administrator privileges.
- Unzip the distribution file to a
temporary directory.
- Run the
setup.exeprogram to begin the installation process - Finish the install process.
Note that if you are using an old Windows 95 release (for example, OSR2), it's likely that you have an old Winsock package; MySQL requires Winsock 2!
Tesing and configuring
Mysql (both unix and windows)
Once installation
is complete use command line mode to test mysql. For windows go to the
directory c:/mysql/bin and for unix
Before testing,
make sure to restart the service mysql under start à windowsàsettingsà Control Panel à Administrative Tools à Services
Use this command
to see something
C:\>
C:\mysql\bin\mysql
When the server
finishes its startup sequence, you should see something like this, which
indicates that the server is ready to service client connections:
C:\mysql\bin>mysql
Welcome to the MySQL monitor. Commands end with ; or \g.Your MySQL
connection id is 4 to server version: 4.1.3b-beta-nt
Type 'help;' or '\h' for help. Type '\c' to clear
the buffer.
The accounts that
are listed in the MySQL grant tables by default have no passwords. After starting the server, you should set up
passwords for them
To get MySQL to
work with TCP/IP on Windows NT 4, you must install service pack 3 (or newer).
Before installing
MySQL as a Windows service, you should first stop the current server if it is
running by using the following command:
C:\> C:\mysql\bin\mysqladmin -u
root shutdown
Now install the
server as a service:
C:\mysql\bin>
mysqld –install or mysql-nt --install
To remove a
server that is installed as a service, first stop it if it is running. Then use
the --remove option to remove it:
C:\>
C:\mysql\bin\mysqld --remove
Some of the more
common error messages you may encounter when installing MySQL and starting the
server for the first time:
System error 1067
has occurred.
Fatal error:
Can't open privilege tables: Table 'mysql.host' doesn't exist
These messages
occur when the MySQL server cannot find the mysql privileges database (under “c:/mysql/data/mysql/” ) or my.ini file not located under Windows directory,
typically located at `C:\WinNT' or `C:\WINDOWS'.
You can test
whether the MySQL server is working by executing any of the following commands:
C:\>
C:\mysql\bin\mysqlshow
C:\>
C:\mysql\bin\mysqlshow -u root mysql
C:\>
C:\mysql\bin\mysqladmin version status proc
C:\>
C:\mysql\bin\mysql test
Password may be
assigned from the command line by using the mysqladmin command:
C:/mysql/bin>mysqladmin
-u root –h localhost password
'yourpassword'
Alternatively
C:/mysql/bin>mysql
-u root;
C:/mysql/bin>SET
PASSWORD FOR 'root'@'localhost' = PASSWORD (‘yourpassword');
Make sure it is automatically started on booting the system.
Now the user root do not have password. First and prior most is assign a password.
C:/mysql/bin
>GRANT usage ON *.* TO ‘root’ IDENTIFIED BY 'yourpassword';
From mysql client application, if you get error message like
"Client does not support authentication protocol requested by server.
Consider upgrading MySQL client"
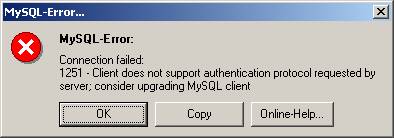
Run this sql from
command line or utility program
C:/mysql/bin>mysql
–u root –p
C:/mysql/bin>use
mysql;
C:/mysql/bin>UPDATE
mysql.user SET Password = OLD_PASSWORD('admin_password') WHERE Host =
'localhost' AND User = 'root';
C:/mysql/bin>UPDATE mysql.user SET Password = OLD_PASSWORD('admin_password')
WHERE Host = '%' AND User = 'root';
And all
other users follow the same
C:/mysql/bin>UPDATE mysql.user SET Password = OLD_PASSWORD('your_password')
WHERE Host = 'localhost' AND User = 'your_user';
C:/mysql/bin> UPDATE mysql.user SET Password = OLD_PASSWORD('your_password')
WHERE Host = '%' AND User = 'your_user';
C:/mysql/bin>FLUSH PRIVILEGES;
Once you have settled in users now time to create chemoventory table log into mysql as command mode
# mysql -e source c:/chemoventory/test/chemoventory.sql or # mysql source c:/chemoventory/test/chemoventory.sql
If you have GUI, just copy chemoventory.sql file and create chemoventory database and tables by executing the following scripts located under test directory
chemonventory.sql

Edit the file
/chemoventory/include/database.inc.php to replace your password and user name
And if mysql and web server were installed in different machine, then replace localhost with machine IP address or by hostname

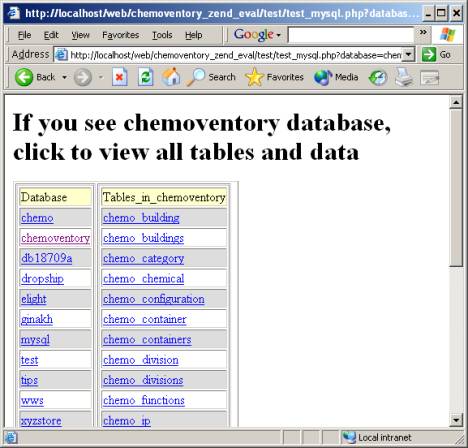
To test mysql use the following URL or appropriate one http://localhost/chemoventory/test/test_mysql.php
You should see the list of databases
Click on chemoventory to see the tables and click the tables to get all the information stored in that table.
If you see something like this, then mysql is not configured properly.

The following one shows, mysql is properly configured.
To
report mysql/php installation error, please run the following and attach
results or screen shots:
Windows or unix Command line enter
C:/mysql/bin> mysql
To check mysql is running in unix
#ps –aux | grep mysql
c:/mysql/bin>mysqlshow
to show databases available
c:/mysql/bin>mysql –u –root –p
enter password
c:/mysql/bin>use mysql;
c:/mysql/bin>show tables;
c:/mysql/bin>select * from user;
Other configurations
For unix/linux servers give full permission (rwx) for the directory
/upload and /msds
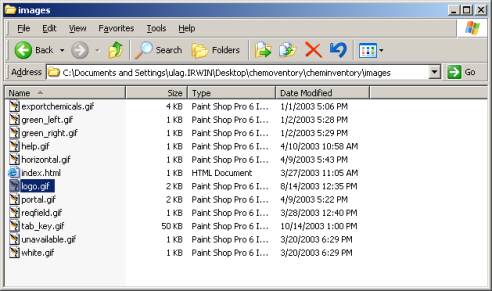
Logo may be replaced
With your own logo.gif file with size approximately 110x60 px
/images/logo.gif

If you are done with this, you may want to configure chemoventory admin section. Read admin manual.
If you want to create your own chemicalID or container #, you have to replace some of the files in the chemoventory with chemoventory/barcode files. And recreate the database with sql scripts provided there
Any questions can be addressed to admin@chemolink.com
We will be happy to assist your installation. Please drop email note, if you are happy about the software.
PHP- Installation links
PHP configuration
http://www.thesitewizard.com/archive/php4install.shtml
http://builder.com.com/5100-6371-1045471-2.html (Unix sendmail)
mysql –installation
http://www.mysql.com/doc/en/Installing.html
Disclaimer, warranty and copyrights:
This software does not have come with any warranty.
We will not be responsible for any damages arising because of using our or associate or recommended software.
You are not allowed to redistribute or resell this software.
You have given rights to modify according to your needs and
Circulate within your department or division.