Part III - Chemoventory 3.0 Installation
Requirements:
By this time, you should have installed and tested successfully
1.Web server (apache/IIS)
2. PHP web application server
3. Zend Encoder accelerator (not required for developer version)
4. MySQL and user account other than root for MySql
If not, please complete the installation and test procedures.
For installation-test, please use chemoventory/test/ files
Methodology:
Each chemical (bottle) is identified as separate entity called chemicalID.
Each chemical is owned by one person at a time and the chemical can be transferable to any other person using the chemoventory tools.
Each chemical is associated with properties by its chemical name. Even though you will have multiple chemicals, you will have one property associated across the inventory management.
Each Chemical àRelated by à One Chemical ID
Each Chemical name à Related by à Properties
CAS à MSDS data sheet
Each Chemical ID à owned by à userID
Can be transferred to another user/owner
Each User ID à One Role à Multiple Functions
Example:
sysadmin (user name) à admin (role) à All functions
user1 (user name) à user(role) à limited functions
Basically you assign tailored function for each role you create and assign to users.
Each chemical may or may not have CAS. If you have CAS you can add MSDS documents. You can file as many MSDS document as you want for each chemical. When you upload the MSDS, it will be associated with CAS followed by consecutive numbers.
Eg 210-65-01_23 (The part before underscore represent CAS and the rest refers some consecutive number from chemoventory.
New features: Each user will have userid , username, email etc. Email will be used to communicate with users. If you set threshold amount, if the amount goes lower than that amount, then owner will get alert email. Similarly, if the chemical is expiring in 7 days, then also you will get an alert emails.
Default login
When you login for the first time, you have to use user name ‘sysadmin’ and password ‘chemo’. The user ‘sysadmin’ by default has been assigned as admin user and its userid has been assigned as “1”. You will see the following screen.
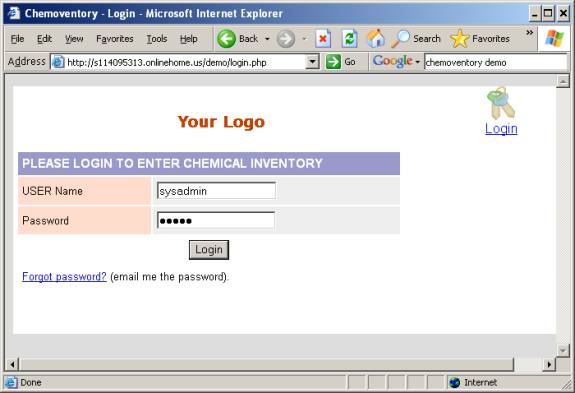
Login screen
You can change the username ‘sysadmin’ to whatever you want to call/name it. Do not change the roles of this user from admin. If you change, you will have problem in administrating some of the functions.
Warning: By any chance do not change ‘userid-1’s role from admin to any other role. And also do not delete any management and basic functions to admin role.
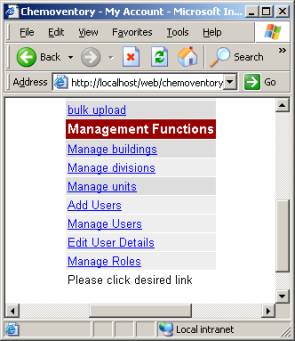
By default, you will see 3 different groups of functions Basic, Inventory and management functions for “sysadmin”. Which are specific for “admin role”. Depending on the roles you set for each user, you will see different functions for different users.
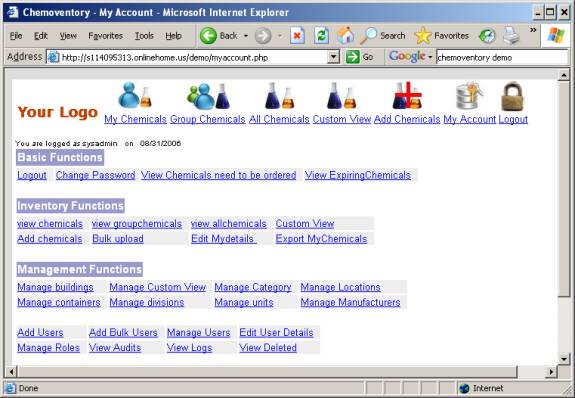
MyAccount screen
Once you login, you must set “sysadmin” email and other details.
To do so, visit http://localhost/chemoventory/admin/ or appropriate URL
If you have allowed to see index, you can see the following files under admin setup:
Configuring admin user
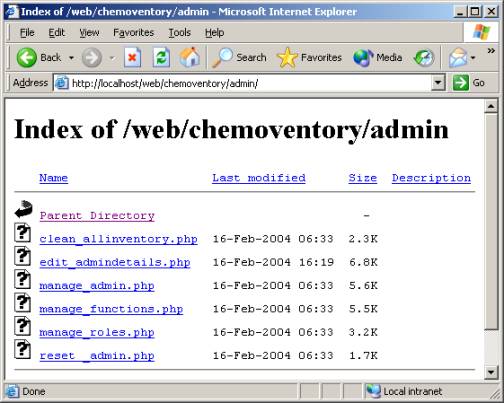
Please note that, these files are given for admin setup and for emergency use only. You must delete this directory as soon as complete admin setup.
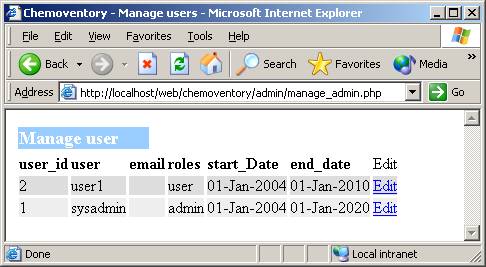
Click on the manage_admin.php or type this URL http://localhost/chemoventory/admin/manage_admin.php
 .
.
Edit the user sysadmin using edit link
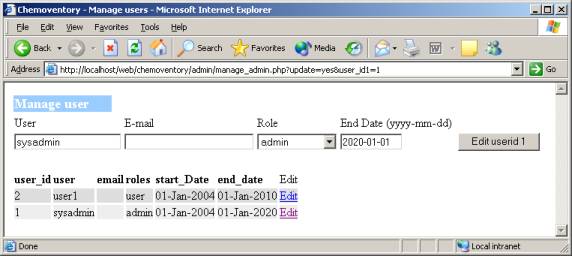
Now you can change the name of user from “sysadmin” to your short name. (All user name should be one word without any special character or spaces) and set email and set any future date (farthest date allowed is 2020-01-01).
If you set invalid date the date will set to current date.
Once, you set email, change your password from “chemo” to your secret password.
To change password visit URL http://localhost/ chemoventory/change_password.php
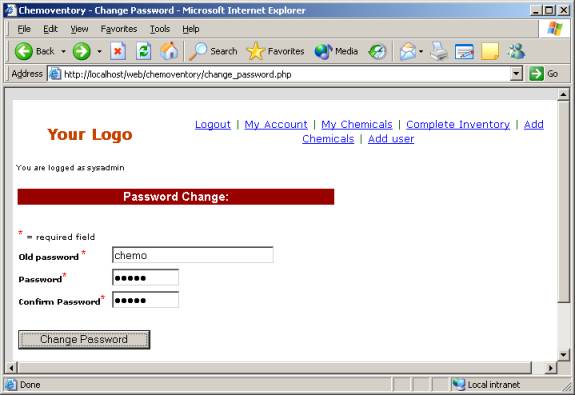
As soon as you set this, make sure you received confirmation email. Otherwise, there is problem with you email setup. Until you set correct email setup, you cannot proceed further. Once you have received email, it is safe to logout and test your new password and or new user name.
Next, step you could add divisions or buildings. To use this facility, you should have function of edit_buildings and edit_divisions respectively at your admin role. By default these functions has been added to admin role.
Under myaccount link (located at the top), you will see this functions, if not you have to add these functions to your role (“admin” role”)
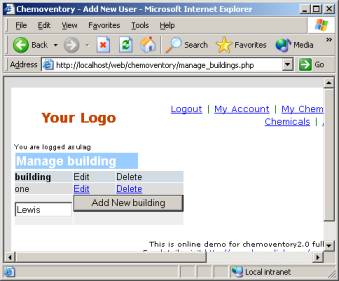
Manage Buildings & Divisions
You can add or edit or delete buildings. Similar to Manage buildings, you can add or edit or delete divisions. (Note: Building may be dropped in the future versions.)
At this time, you should add all the buildings and divisions; you want to list for your inventory. Deleting building or division at any time will not automatically delete the entries from the inventory, which are located at these division or building. However future entry will be not allow automatic listing of these entries.
If you do edit the entries, all the data in inventory will be automatically updated.
Also note that, all divisions and building will be automatically convert to Upper case words (only first letter of the word)
All units will be automatically converted to lower case.
You should follow these rules, in order to maintain consistency in the inventory.
All containers will be as entered as such.
Note: If the users do use bulk upload without proper division or buildings or units then over a time your inventory will have mixed building or division or unit names and may not be easy to manage. So, please advise users to use appropriate list of allowed division, buildings and units
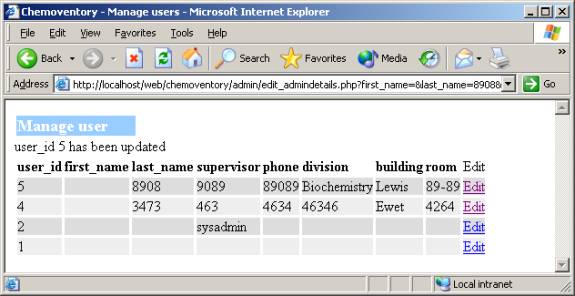
Once you set or added the entries for Buildings and Divisions you can set the admin details using the URL http://localhost/chemoventory/admin/edit_admindetails.php. Remember admin user id is “1” and set appropriate first name, last name, supervisor, phone, division, building and room #.
Make sure “admin” role has all the available functions.
You can check this by this URL http://localhost/chemoventory/admin/manage_roles.php
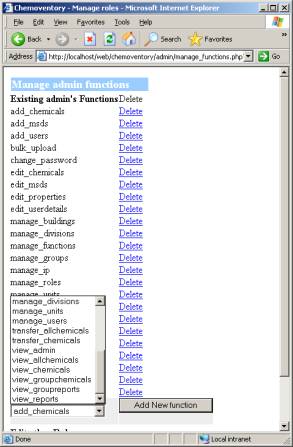
Once all this process has been completed, you should delete chemoventory/admin/ directory and the files in there. Keep this directory in a separate CD or storage drive. You may need these files, when you have trouble in logging as user_id “1” or troubles in “admin” role.
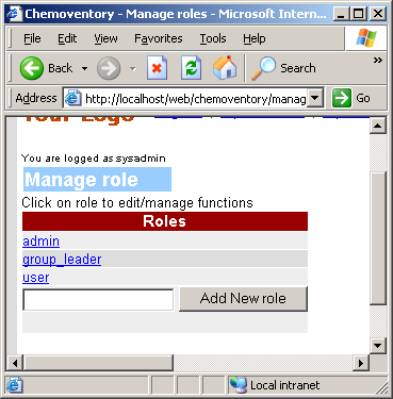
Roles & Functions
You assign set of functions to a role. And associate each user with a role. For example admin is a role and user is another role and group_leader is another role. By default, you will have 3 roles
admin
group_leader and
user
Functions are like view_chemicals, view_allchemicals, manage_users etc. We have assigned all the functionalities to “admin”. If not, you can add using the above-mentioned methods using links provided at admin directory. And some set of functions for each other role. You can create as many roles as you want and assign set of functions to it.
A
Creating New Users
Users with “admin” role or users who has role, which has function to create another user, can create another user. When one creates new user, new user will be assigned supervisor of whoever created. And all new users will be created as user- role with one-year period as end_date. Password will be automatically emailed to the user’s email address, you enter at the time of creation.
User name, details, supervisor and end_date can be changed by the function manage_users and edit_userdetails.
http://localhost/chemoventory/manage_users.php
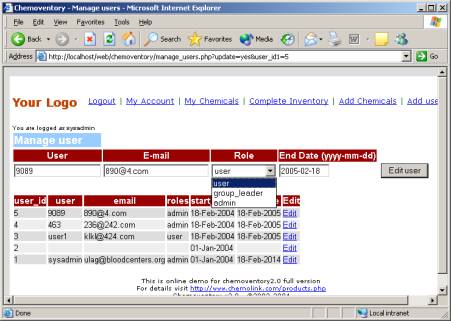
Incase, you entered invalid end date, current date will be entered ad end_date. You can assign any role you want form the all-available roles.
http://localhost/chemoventory/edit_userdetails.php

If you assign users with details, these details will be automatically available during single addition of chemicals.
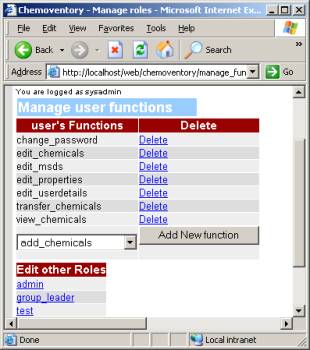
Managing Roles and functions
By default, you have 3 roles and limited set of functions. You can create more roles and assign set of functions to each it. You can assign a role to user. By default all new users will be created with user-role.
You can change assigned functions for these roles (except for admin-role). Depending on level of need, you can create more roles and assign to users. And remember to assign basic functions of change password and or view_chemicals.
This the URL you can use to manage roles and functions
http://localhost/chemoventory/manage_roles.php
To add new role just add. Please use single word to create a user. Once you created role, you cannot delete or edit the role. However, you can change the assigned functions to it.
Click on the role to edit assigned functions
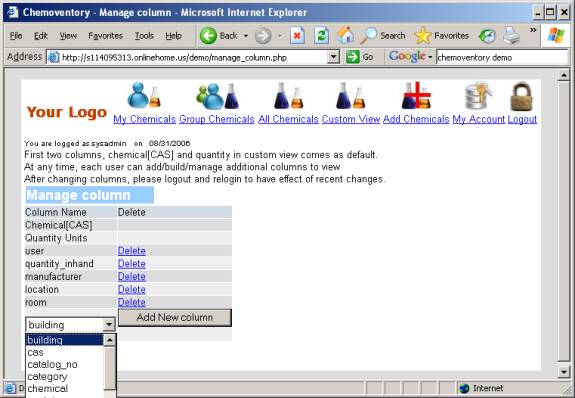
Manage Custom view (August 2006)
There has been request to add custom view of chemical columns you see. We understand that one size does not fit every one.
So we have added custom view of columns you want. Each user
can set his/her own columns to see. You have choice of more than 15 columns : building, cas, catalog_no,
category, chemical, container, container_size, division, email (owner’s email), invoice_number, location (chemical location) , lot_no, purchase_date, purchase_order, purity, quantity (at the time of acquisition) , quantity_inhand, received_date, room, threshold, user (owner’s login name), .user_id, manufacturer, mixture and units. Chemical name, cas, quantity-in-hand and units are pre-assigned as first two columns. For the rest of column, you can tailor your own desired column. Once you assigned, you must logout and re-login to have these changes in-effect in custom view pages. Each user can assign his own way to see the columns.